Showing posts with label Crafts. Show all posts

1.02.2019

Winter Name Activity


In preschool, children learn to recognize, spell, and write their own names.  This is a BIG early literacy goal and acts as a springboard for all kinds of learning.


Today I want to share an easy, hands on winter name activity that is perfect for little ones at home or school.  I call this SNOWY NAMES and it can be done 3 different ways.  For each version you will need a sheet of blue paper with each child's name written or printed out on it.


Snowy Marshmallow Names

This first version is favorite because it involves FOOD!  Have each child outline their name with Elmer's glue and then stick on mini marshmallows to form each letter.  Be sure to set aside a few extra marshmallows for your kiddos to snack on while they work.  ;)


Snowy Dot Sticker Names

In this version give each child a few sheets of plain white dot stickers then have them peel and stick them to form each letter.  I found the dot stickers at the dollar store, but binder reinforcement stickers would work great too.  Using stickers is a great way to build fine motor skills.


Snowy Cotton Ball Painting

If you don't mind a little mess this version is super fun!  Pull out the white paint, add some cotton balls, and clothespins then let your little one get busy forming the letters in their name by painting and dabbing snowy dots.
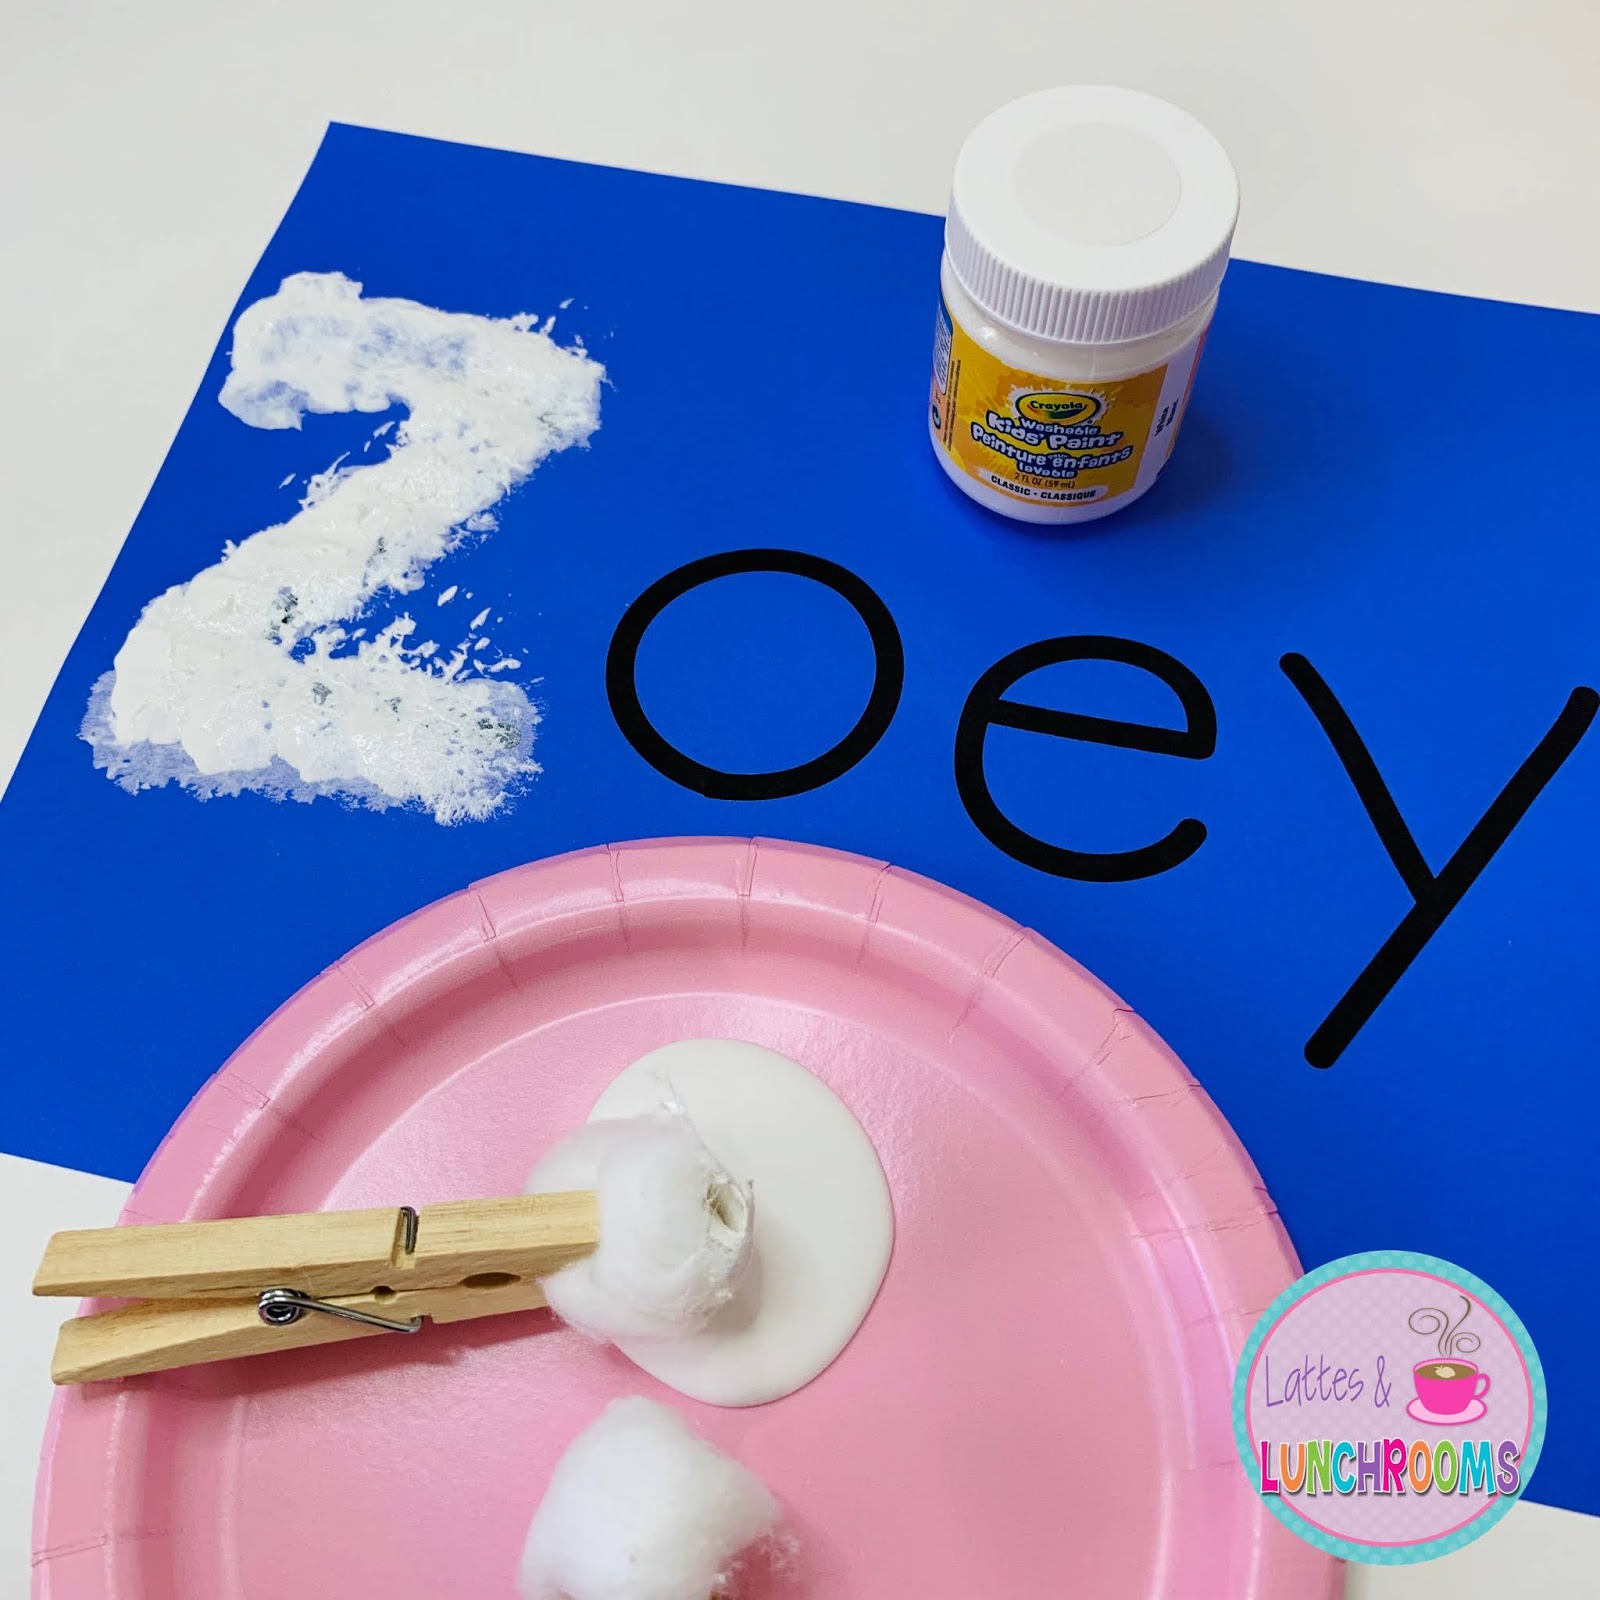

And while this activity looks like play, these simple name activities provide lots of learning too!  Don't forget to chat about letter names, letter sounds, how a capital goes at the beginning of a name, the proper way to form letters etc.  Learning is FUN!  
Which activity is your favorite?


4.01.2015

Sponge Painted Easter Eggs

I can't believe Easter is Sunday!  Seriously where has the time gone?  Since I'm not in the classroom my mind is pretty much baby this and baby that at the moment so I find myself having "whoa" moments when I realize that the next holiday is already upon us. Yikes!


If you are in the classroom this week I'm sure it's full of spring and Easter fun so I wanted to share one of my favorite, oh so simple, Easter crafts... Sponge Painted Paper Eggs!  Variations of this little number can be spotted all over Pinterest and I love that the finished paper egg can be used as hanging wall art, added to a card, used as a writing prompt or even as an addition to an Easter bag!

So how do I make this craft?

1. Collect these Materials:
- Egg template (Grab various sizes for Free at this website!)  I like to print on card stock for better durability.
- Paint in a variety of colors. (Basic liquid tempera works just fine.)
- Sponges (Cut into various sizes)
- Plates or something to put the paint on.

Optional:
- Clothespins if you prefer students to not get their hands all dirty. Ha-Ha
- Painters tape if you'd like to add spots, stripes etc.

2.  Prep and Model:


3. Let your students create their own eggs!


4. Let them dry and then cut them out.  Use the eggs as decoration pieces, writing inspiration etc.  Add torn paper or a ribbon bow to dress them up more.  The possibilities are endless!

Click HERE to grab my half page FREE writing sheet.


And that's it!  Use the eggs however you see fit!  This activity is perfect for a simple art center.  Happy Hump Day!

2.17.2015

Getting Crafty in Kinder


Getting crafty with kinders can be a lot of fun but sometimes a simple craft can make you run....  Today I'm here with a little post about how I manage crafts in an early primary classroom.  I truly believe that any group of kiddos can complete a little craft and get your room back into shape when it's all done if you have a plan in place.  Here are two ways that I have done crafts in the past.  Generally speaking I usually pick  2 -3 ways and stick with them for the entire year.  That way students know what is expected of them during craft time.  Here are two examples of how I'd get my class to complete a craft at the same time, not if they were in small groups.


Idea 1: Circle Up! -This approach is very structured and for when a project has many steps or needs to be done just right.

Prior to starting:  Write out the step by step process for how to complete the craft on a piece of chart paper.  Then lay out the craft materials in order and place them somewhere you can easily get to.  

With the Kiddos: Basically for this plan all you do is have your kiddos bring their basic supplies (example: scissors/glue) to the rug and then have them sit in a circle.  From there together read aloud the first step for making the craft.  Next YOU model this step.  Then pass out the material needed for students to complete this step and they complete the step.  Once everyone has completed the first step you move on.  Again, everyone reads aloud the second step.  You then model the step and next students complete the step.  This process continues until the craft is complete.

Why it Works:  Each step is done systematically one by one.  You can easily walk the circle to check how students are doing and identify who needs support. Generally the project is completed in a short amount of time because you all start and finish together.


Idea 2: Craft Bags - This approach gives students more independence. This is the perfect for simple crafts and the materials for this plan are bagged individually for each student.

Prior to Starting:  Write out a simple step by step process for how to complete the craft.  Don't forget to include pictures.  Then prep student materials by placing all materials in a large ziplock bag for each student.  

With the Kiddos: To start gather students in your meeting place and model how to do the project.  Be sure to emphasize reading and following the steps in order.  Then send students to their table spots with a craft bag and let them go to work.  *For this plan be sure to have a designated place for students to place their projects when they are finished and also an "I'm done"  activity so they know exactly what to do.

Why it Works: Students are able to work at an independent pace but materials have previously been sorted and divided so students have all they need at their table spots. This helps minimize the need to walk around.  This plan encourages students to follow steps on their own and to compete a project independently.

I hope this gives you some added ideas on how you might plan craft time in your room.  How do you organize crafts in your class?  Leave me a comment and let me know.


Home About Shop Freebies Contact Me Image Map Pinterest Facebook TPT Bloglovin' Instagram